In this guide, we will walk through how to use the Price Adjustment Matrix, a custom out-of-the-box solution provided by NGP, to manage regional discounts for customers. We will demonstrate this use case with Applikon, a company that wishes to apply discounts based on customer regions.
NOTE: As Price Adjustment Matrix is a custom out-of-the-box solution provided by NGP we will show this use-case with an example.
Applikon is a company that wants to provide discounts(percentage/amount/override) for customers who belong to certain regions. They want to leverage the Price Adjustment Matrix element to achieve this use case.
1. Log in as a Pricing Analyst
- Begin by logging into Salesforce with the appropriate credentials that allow you to manage pricing and configuration settings.
2. Create the “Customer Region” Entity
To align with the use case, create a custom object called “Customer Region” .
| Field Name | Datatype |
| Account Region | Text |
| Account Status | Text |
| Adjustment Type | Text |
| Adjustment Value | Number |
| Product | Lookup (Product) |
| Customer Region Name | Text |
Action: Populate the “Customer Region” object with some sample records to facilitate testing.
3. Create Decision Tables
- Navigate to Decision Tables
Use the App Launcher and search for Lookup Tables.


Create a New Decision Table
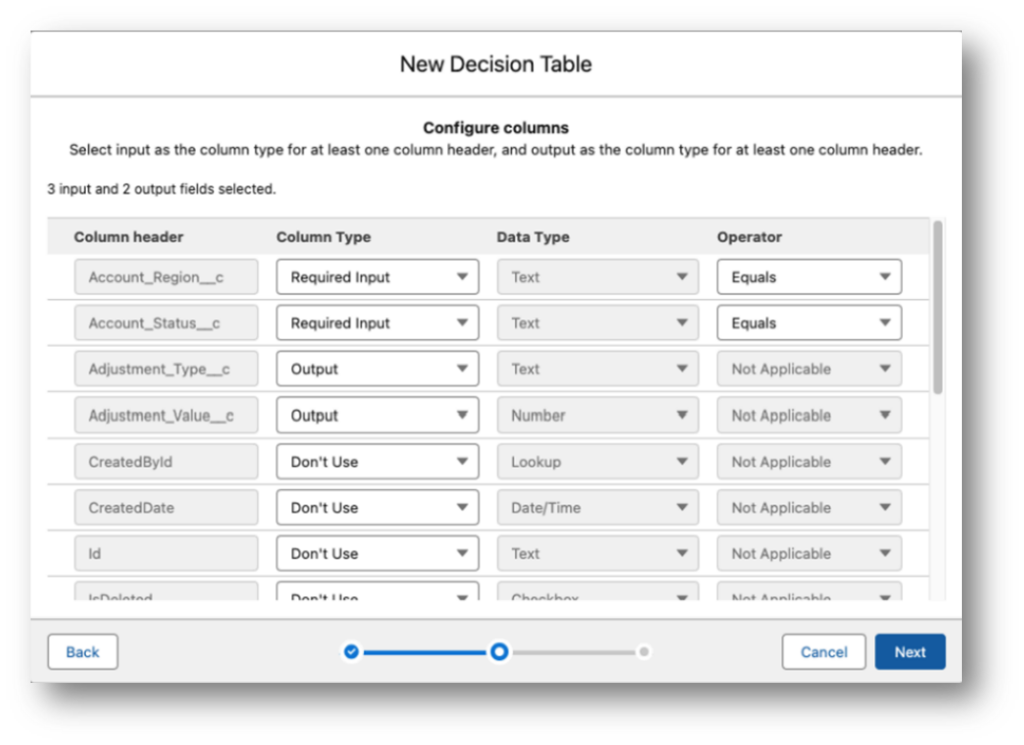
- Usage Type: Set this to Pricing.
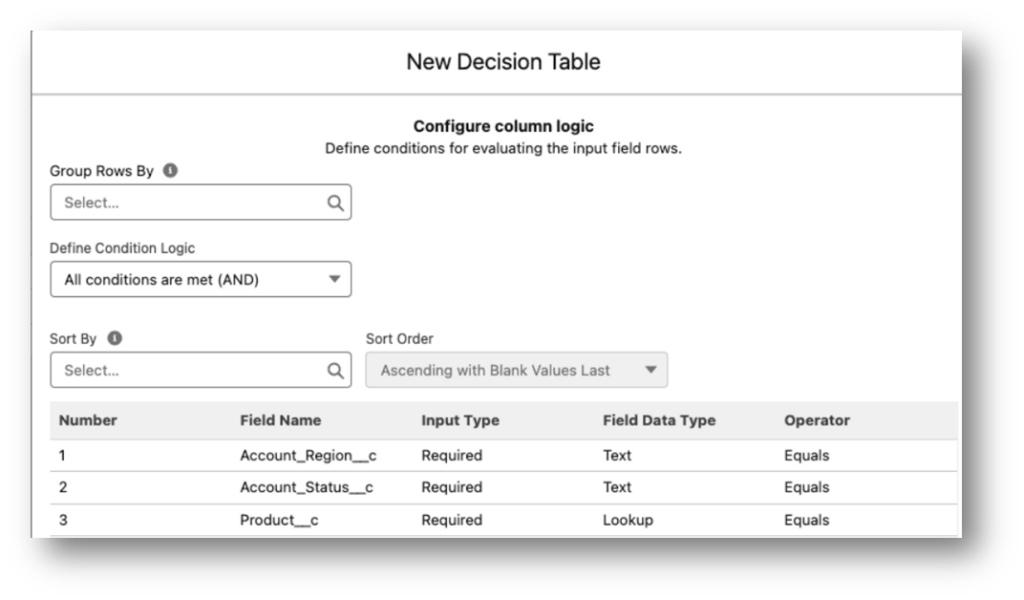
Inputs: Define the required inputs as follows:
- Product: Required Input
- Account Region: Required Input
- Account Status: Required Input
Outputs: Define the outputs as follows:
- Adjustment Type
- Adjustment Value


Save and Activate the Decision Table.
Modify the Pricing Procedure
1.Access Pricing Setup: Go to Setup and search for Salesforce Pricing.
2.Select the Recipe: Choose NGPDefaultRecipe.
3.Configure the Price Adjustment Matrix: Navigate to the Price Adjustment Matrix tab.
-Click Modify.
-Select and activate the Decision Table created earlier.
-Set the Component Type to Customer Discount and save your changes.
5. Create a Pricing Procedure
1.Access the Price Management Application: Navigate to the Price Management app and select Pricing Procedure.
2.Add Price Adjustment Matrix: Incorporate the Price Adjustment Matrix into the procedure.
.

Select the decision table that was created earlier & activated and click on save. Keep the component type as “Customer Discount”.

Now, Let’s go ahead & create a simple Pricing Procedure.
Go to the Price Management application & select Pricing Procedure.


Select Include in output

3.Configure Rank and Version
Rank: Set to 1 to indicate the priority of this Pricing Procedure version.
Versioning: Use versioning to control which procedure version applies to pricing calculations.
4.Activate and Simulate
Click Activate and simulate the pricing experience to verify that the configuration works as expected.


6. Final Steps in Revenue Settings
Setup Price Management
Go to Setup, search for Revenue Settings, and select Setup Price Management.
Select the newly created Pricing Procedure to make it active for pricing calculations.
Test the Setup with a Quote
1.Create a Quote: Add products to the quote and ensure you populate all the required input fields.
2.Re-Price the Line Item: Edit the quantity or re-add the Line Item to trigger the pricing engine.
Verify that the custom discount appears based on the Price Adjustment Matrix configuration.

Re-price the LineItem by editing the Quantity or re-adding it. You should see the Custom discount.

Conclusion

