Key Components of DRO:
Order Lifecycle Management and Fulfillment Management are the two primary aspects of DRO.
Updating the Order Submit Flow
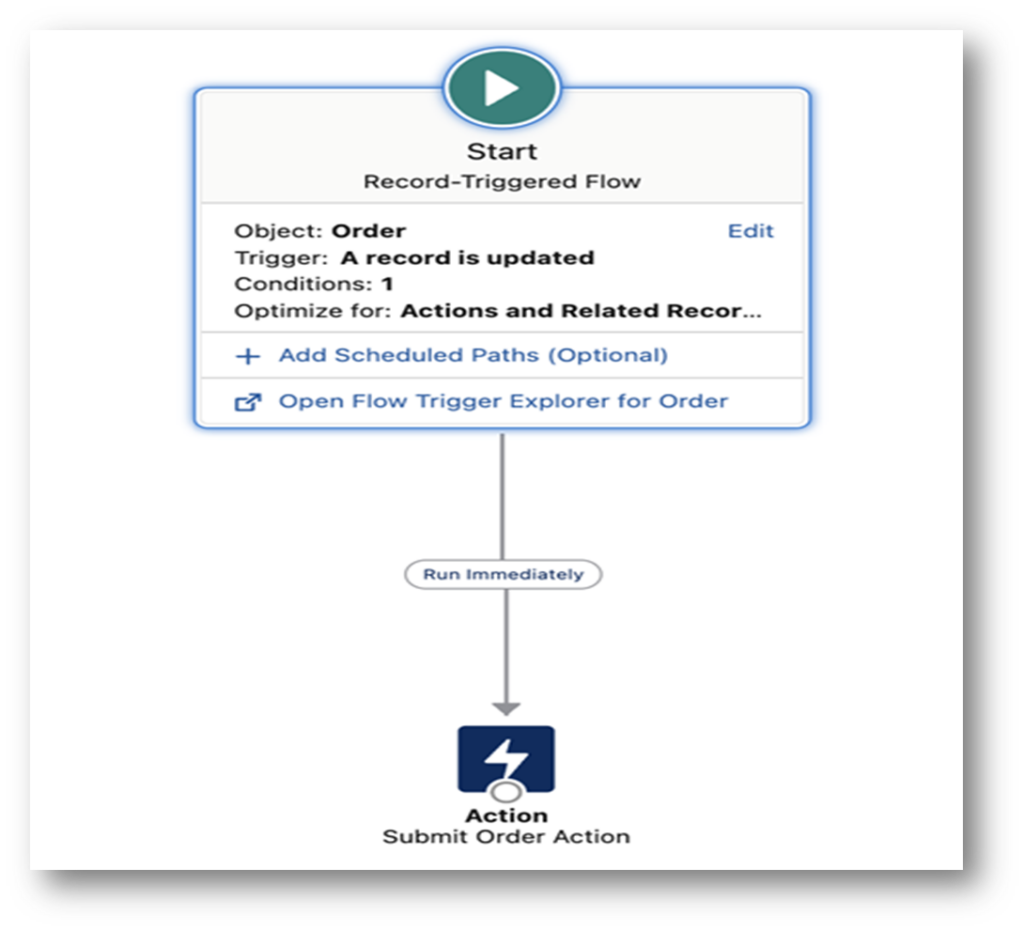
A flow is used to invoke the Submit Order API element. Typically, when the Order Status transitions to an “Activated” value, this triggers the flow to submit the order for fulfillment. Salesforce provides a ready-made flow template that you can clone, along with detailed cloning instructions.
However, the default flow setup doesn’t function as intended. Fixing it is straightforward—simply remove the Get element and the Decision element, leaving only the API element in the flow.
Modify this

To this
Extending the FulfillmentAssetContext Context Definition
As with the initial setup of Context Definitions, you need to extend the FulfillmentAssetContext provided out-of-the-box (OOTB). Click Extend, then save it with a new name—such as RLM_FulfillmentAssetContext. Afterward, edit the definition to mark the mapping as Default, and don’t forget to activate it.
Setting Up Context Definitions for Dynamic Revenue Orchestration
1.Navigate to:
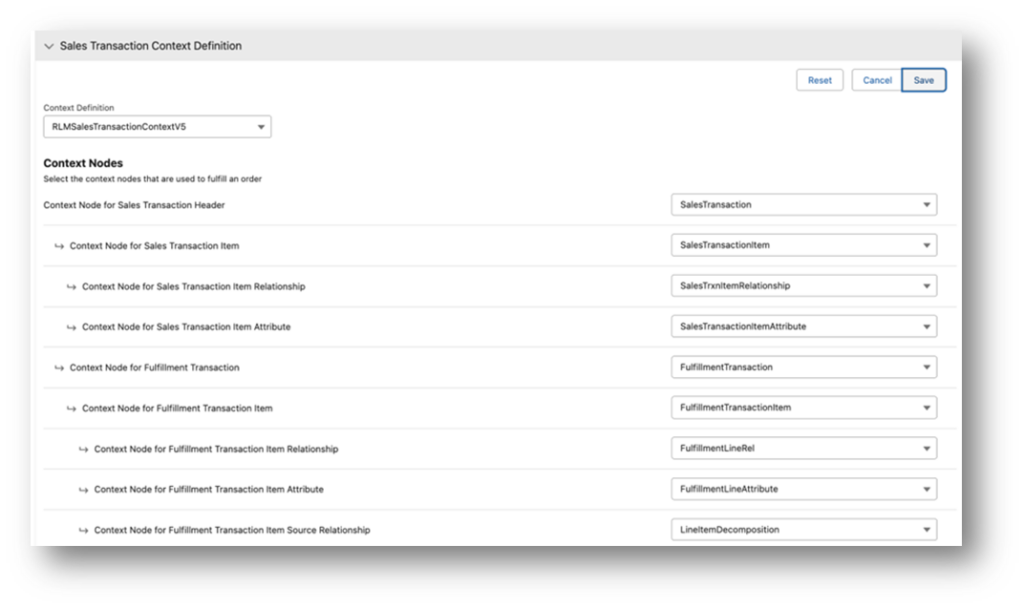
– Setup > Feature Settings > Dynamic Revenue Orchestrator > Context Definition Settings
2. Update Sales Transaction Context Definition:
– In the Sales Transaction Context Definition section, set it to the latest version of your RLM Sales Transaction Context Definition.
→ Tip: Be sure to update this setting every time you create a new version.
Update Fulfillment Context Definition:
In the second section, select your newly extended RLM_FulfillmentAssetContext definition for this setting as well
You must map each node

Ensuring Attribute Mapping for Fulfillment
These settings guarantee that any attributes selected on a product will seamlessly carry over to the records visible to your fulfillment team. Keep in mind that additional configuration is required to set up attribute mapping effectively.
About Order Lifecycles
Salesforce provides documentation on Order Lifecycles within Revenue Cloud. However, as of mid-November 2024 (Dreamforce), this documentation has not yet been updated to reflect recent changes. The new process introduces additional objects that enhance lifecycle management.
Setting Up Order Lifecycle Management
1. Create a Custom Permission and Permission Set
- Navigate to Setup > Custom Code > Custom Permissions.
- Create a new custom permission called Object State Transitions.
- Add a description like: “Allows the creation of records for Object State Transition and Object State Value to define Order Lifecycles.”
Important: Note down the recordId as it will be needed later
2. Create a Custom Permission Set
- Clone the Orchestration Process Manager Permission Set (this set is unique as it provides access to Custom Permissions settings).
- Name the new set something like Custom Order Mgmt Permission.
3. Configure and Assign Permissions
- Open the newly created permission set and navigate to Custom Permissions.
- Click Edit, then select the Object State Transitions permission you created earlier.
Assign the Custom Order Mgmt Permission to yourself and any other users responsible for managing order fulfillment
Creating an Object State Definition Record
- Set Up Stage Picklist Values:
Begin by adding Stage picklist values to the Order object. - Define Custom Order Stages:
Create custom stages to reflect the order lifecycle, such as:- Draft → Ready to Submit
- Ready to Submit → Submitted
- You’ll also define valid transitions between these stages.
- Create Records for Lifecycle Management:
To configure these transitions, you’ll need to create records on the following objects:- Object State Definition
- Object State Value
- Object State Transition
- Note: Direct access to Object State Value and Object State Transition objects is not available through the App Launcher. These records can only be accessed via the Related List tab on Object State Definition records.
- Use Existing Definitions as References:
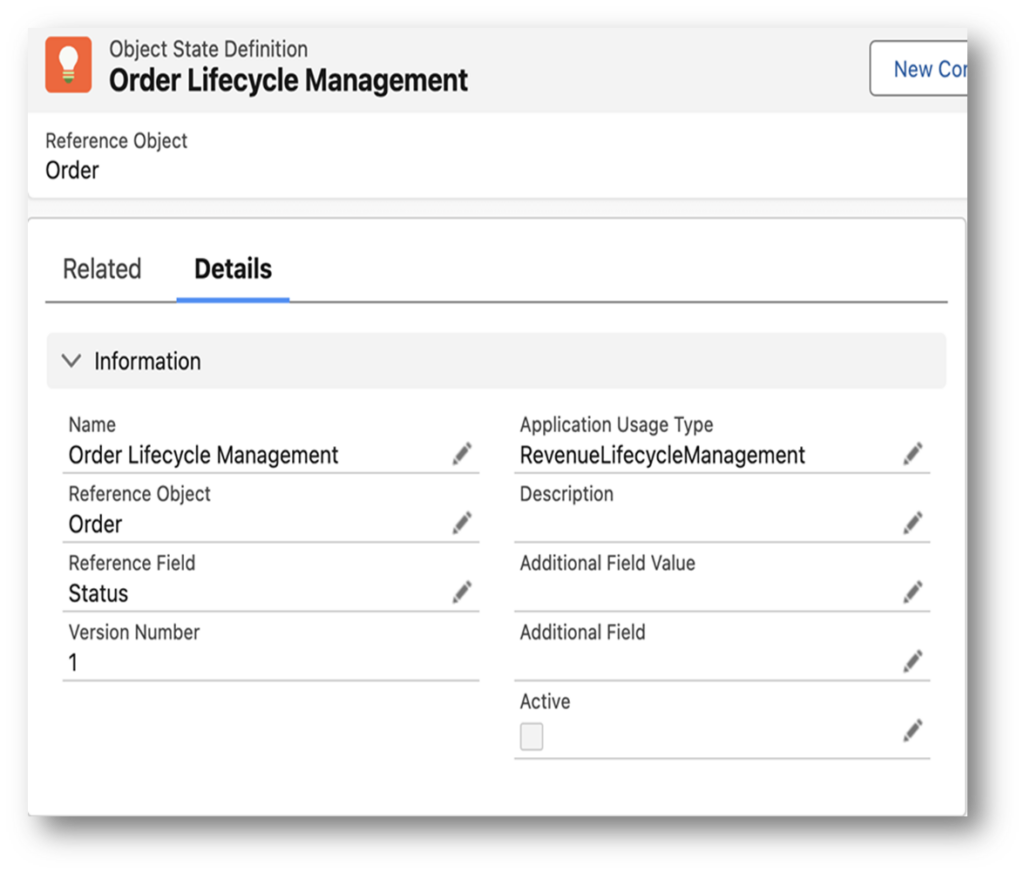
In my org, an Object State Definition for Contract Lifecycle Management already existed, along with its related records. - Create a New Object State Definition Record:
- Create a new Object State Definition record for Order Lifecycle Management.
- Set the record’s initial status to Draft.
- Configure the record to reference the Stage field on the Order object.
- Important: Take note of the Object State Definition record ID, as it will be required later.
Creating Object State Value Records
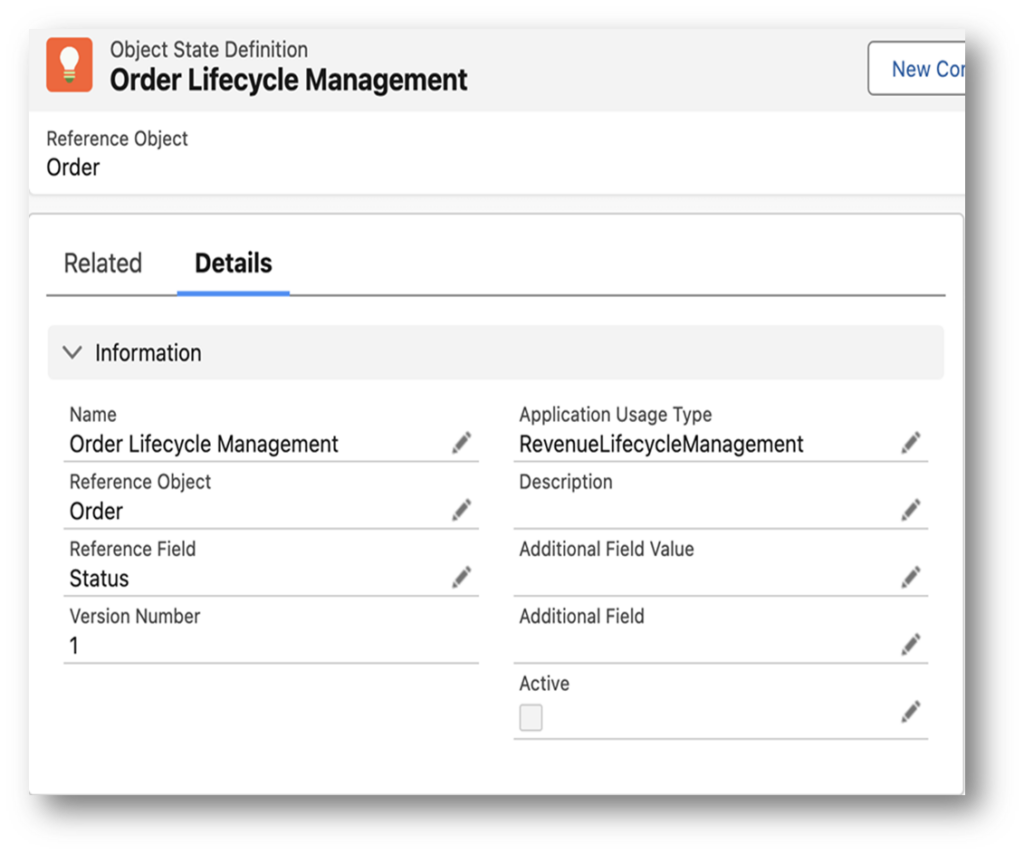
- Navigate to the Related Tab:
On the Related tab of the Object State Definition record, locate the lists for Object State Values and Object State Transitions, each with a New button. - Create Object State Values:
Use the New button to create records for the following Order Stages:- Draft
- Ready to Submit
- Submitted
- Processing
- Fulfilled
- Rejected
- On Hold
- Cancelled
- Partially Fulfilled
- Awaiting Approval
- Approved
- Custom Permission Field Bug:
- These records include a lookup field for Custom Permission, where you would typically select your Custom Order Mgmt Permission.
- However, a known Salesforce bug prevents this field from being populated at the moment.
- Continue Without Custom Permission:
- Proceed with creating the records and leave the Custom Permission field blank.
- Maintain a list of the record IDs for each Object State Value you create; these will be critical for implementing the workaround later.
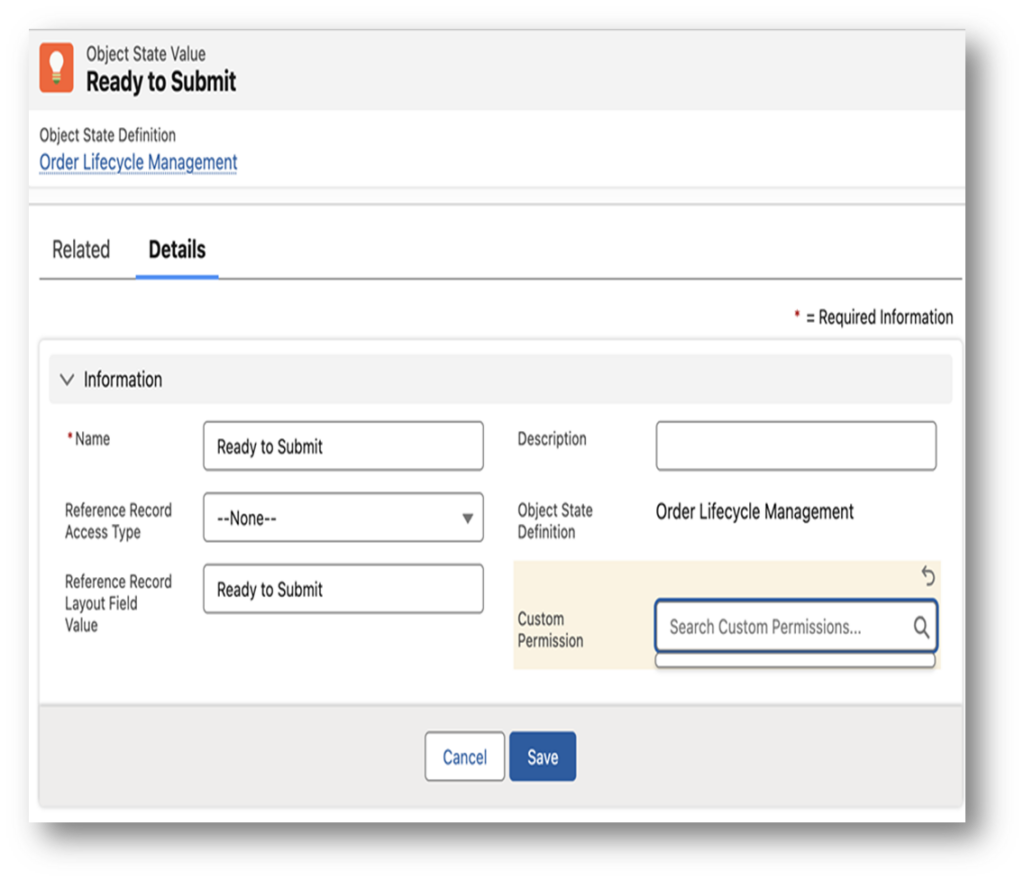
If you want to limit access to the Order, you can select one of the values in the Reference Record Access Type picklist, but this isn’t required. The Reference Record Layout Field Value isn’t required, but you should enter the Order Status picklist value that corresponds to this Object State Value.
Create Object State Transition Records
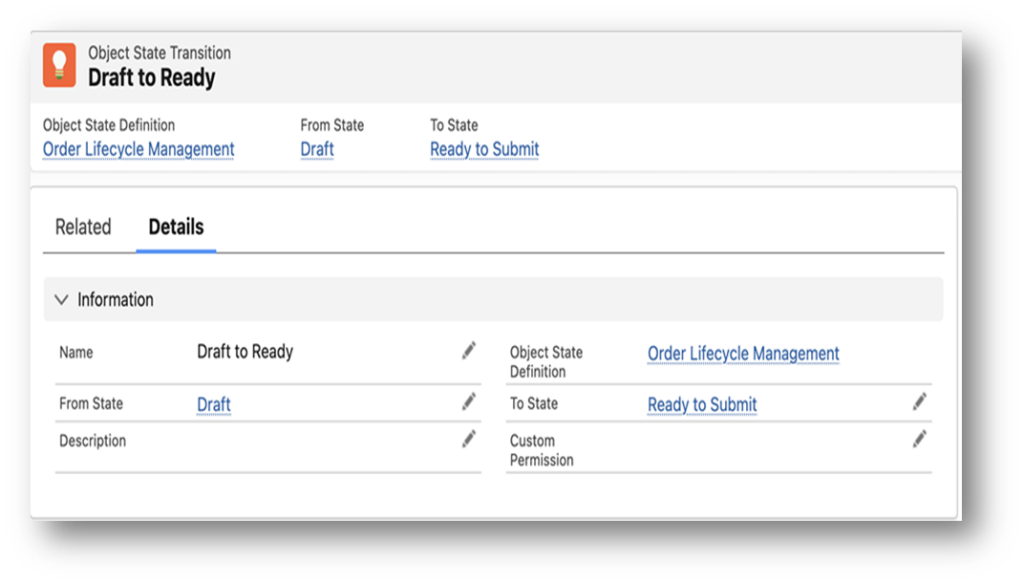
Next, create Object State Transition records. These are the records I created:
● Draft to Ready
● Ready to Submitted
● Submitted to Processing
● Processing to Fulfilled
● Processing to Rejected
Here, you have lookup fields to your Object State Value records so you can define the From State and the To State. You also have a lookup to the Object State Definition you created. And finally, a lookup to your Custom Permission–which, again, a bug prevents you from populating. Create your records and leave the Custom Permission field blank. → Again, as you create the records, keep a list of the record Ids.
Populating The Custom Permission
To update the Custom Permission fields for your Object State Transition and Object State Value records, follow these steps using the Developer Console:
1.Open the Developer Console:
Click the gear icon in Salesforce and select Developer Console.
2.Access the Execute Anonymous Window:
From the top menu, go to Debug and select Open Execute Anonymous Window.
A modal labeled Enter Apex Code will appear.
3.Run the Apex Code:
Copy and paste the code below into the modal, then modify it with your specific record IDs:
Apex Code
// User-provided values
String userProvidedObjectStateDefinitionId = ‘IDPROVIDEDBYUSER’;
String newCustomPermissionId = ‘NEWCUSTOMPERMISSIONID’;
try {
// Update ObjectStateTransition records
List<ObjectStateTransition> ostRecords = [
SELECT Id, CustomPermissionId
FROM ObjectStateTransition
WHERE ObjectStateDefinitionId = :userProvidedObjectStateDefinitionId
];
for (ObjectStateTransition ost : ostRecords) {
ost.CustomPermissionId = newCustomPermissionId;
}
if (!ostRecords.isEmpty()) {
update ostRecords;
}
// Update ObjectStateValue records
List<ObjectStateValue> osvRecords = [
SELECT Id, CustomPermissionId
FROM ObjectStateValue
WHERE ObjectStateDefinitionId = :userProvidedObjectStateDefinitionId
];
for (ObjectStateValue osv : osvRecords) {
osv.CustomPermissionId = newCustomPermissionId;
}
if (!osvRecords.isEmpty()) {
update osvRecords;
}
System.debug(‘Records updated successfully.’);
} catch (DmlException e) {
System.debug(‘An error occurred: ‘ + e.getMessage());
}
Replace IDPROVIDEDBYUSER with the record ID of your Object State Definition.
Replace NEWCUSTOMPERMISSIONID with the record ID of your Custom Permission.
Execute the Code:
Click Execute to run the code.
If the execution is successful, the Custom Permission field will be updated for all the relevant records.
Activating the object state definition
To activate your Object State Definition:
- Open the record.
- Check the Activate checkbox.
Objects Not Relevant to Dynamic Revenue Orchestration
In your org, you may see two objects associated with Contract Lifecycle Management (CLM):
- Object State Action Definition
- Object State Transition Action
These objects are automatically created when a CLM license is enabled.
Key Points:
- These objects are unrelated to Dynamic Revenue Orchestration (DRO) and can be ignored.
- Admins can create new records for these objects but should avoid altering system-generated records.
- The CLM Admin Permission is required to view them.
For your work with DRO, these objects are not needed and can be disregarded.

